How to Care for Orchids: A Complete Guide to Growing and Maintaining These Stunning Plants
Orchids are among the most elegant and captivating houseplants you can grow. With their exotic blooms and long-lasting flowers, they add a touch of sophistication to any space. However, many people shy away from growing orchids because they believe these plants are difficult to care for. The truth is, with the right knowledge and a little patience, you can successfully grow and care for orchids, even if you’re a beginner.
In this comprehensive guide, you’ll learn everything you need to know about how to care for orchids, from choosing the right type to providing the perfect growing conditions. Whether you’re nurturing a Phalaenopsis or a Cattleya, this guide will help you keep your orchids healthy, thriving, and blooming year after year.
Why Orchids Are Worth the Effort
Orchids are more than just beautiful flowers—they’re a rewarding challenge for plant enthusiasts. Their unique shapes, vibrant colors, and intoxicating fragrances make them a standout addition to any home. Plus, with proper care, orchids can bloom for months and even rebloom multiple times a year.
If you’ve ever wondered how to care for orchids, you’re not alone. These plants have specific needs, but once you understand them, you’ll find that orchids are surprisingly low-maintenance. Let’s dive into the essentials of orchid care.
Choosing the Right Orchid for You
Before you start caring for orchids, it’s important to choose the right type for your environment and skill level. Here are some of the most popular orchids for beginners:
- Phalaenopsis (Moth Orchids): Known for their long-lasting blooms and ease of care, these are perfect for beginners.
- Dendrobium: These orchids produce clusters of flowers and thrive in bright light.
- Cattleya: Often called the “queen of orchids,” Cattleyas are known for their large, fragrant blooms.
- Cymbidium: Ideal for cooler climates, these orchids produce multiple flower spikes.
Each type of orchid has slightly different care requirements, so it’s important to research the specific needs of your chosen variety.

How to Care for Orchids: The Basics
- Light: The Key to Healthy Orchids
Orchids need bright, indirect light to thrive. Place your orchid near a south- or east-facing window where it can receive plenty of natural light without being exposed to direct sunlight, which can scorch the leaves.
If you don’t have access to natural light, consider using an LED grow light to provide the necessary illumination. Rotate your orchid every week to ensure even growth and prevent it from leaning toward the light.
- Watering: Finding the Right Balance
One of the most common mistakes in orchid care is overwatering. Orchids prefer to dry out slightly between waterings. To check if your orchid needs water, stick your finger about an inch into the growing medium. If it feels dry, it’s time to water.
When watering, thoroughly drench the roots and allow excess water to drain out completely. Avoid letting your orchid sit in standing water, as this can lead to root rot.
- Soil: The Right Mix for Healthy Roots
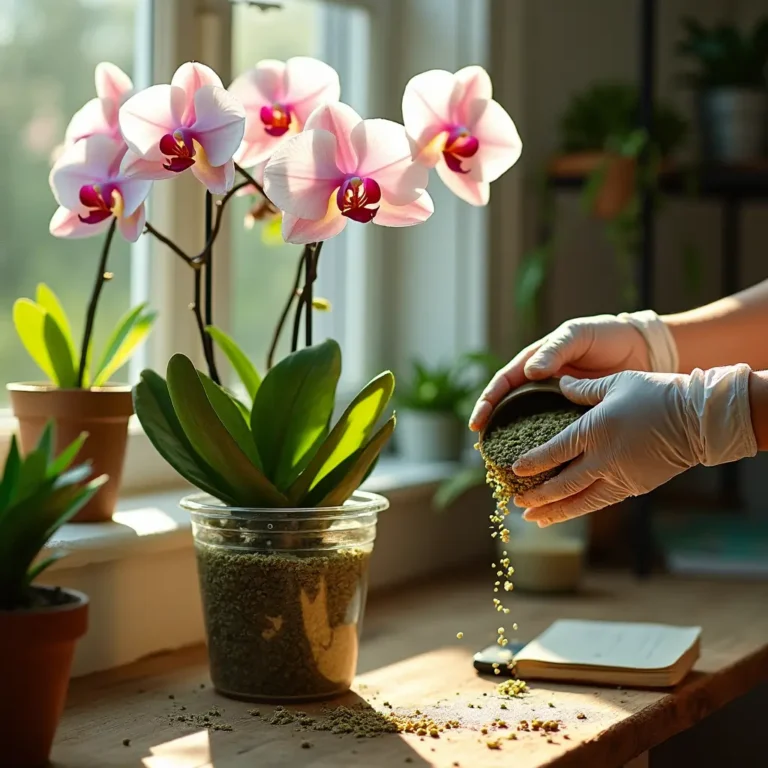
Orchids don’t grow in regular potting soil. Instead, they need a well-draining, airy medium such as a mix of bark, sphagnum moss, perlite, and peat. This type of medium allows air to reach the roots and prevents them from becoming waterlogged.
- Temperature and Humidity: Creating the Ideal Environment
Most orchids thrive in temperatures between 50°F and 90°F, with a slight drop at night to mimic their natural habitat. They also prefer humidity levels between 40% and 70%.
To increase humidity, place a humidity tray near your orchid or use a room humidifier. Avoid placing your orchid near heating vents or air conditioners, as these can create dry, stressful conditions.
- Fertilizing: Feeding Your Orchid
During the growing season (spring and summer), fertilize your orchid every two to four weeks with a balanced, water-soluble fertilizer diluted to half strength. Reduce fertilization during the winter months when the plant is dormant.
Orchid Care After Flowering
Once your orchid’s blooms have faded, don’t toss it out! With proper care, your orchid can rebloom. Here’s what to do:
- Prune the Flower Spike: For Phalaenopsis orchids, cut the spike just above a node if it’s still green. For other types, remove the entire spike.
- Repot if Necessary: If the growing medium has broken down or the roots are overcrowded, repot your orchid into a slightly larger container with fresh medium.
- Provide Rest: Reduce watering and fertilization for a few weeks to allow your orchid to recover.
Common Orchid Problems and Solutions
Even with the best care, orchids can encounter issues. Here’s how to troubleshoot common problems:
- Yellow Leaves: Often caused by overwatering or poor drainage. Adjust your watering schedule and ensure the pot has proper drainage.
- Drooping Leaves: This can indicate underwatering or insufficient light. Check the roots and adjust your care routine accordingly.
- Bud Drop: Stress from temperature fluctuations, low humidity, or chemical exposure can cause buds to fall off. Keep your orchid in a stable environment.
- Pests: Watch for aphids, mealybugs, and spider mites. Treat infestations with insecticidal soap or neem oil.
Tips for Encouraging Orchids to Rebloom
Getting your orchid to rebloom is one of the most rewarding aspects of orchid care. Here’s how to encourage repeat blooms:
- Provide Adequate Light: Ensure your orchid receives enough bright, indirect light.
- Maintain Proper Temperature: A slight drop in nighttime temperatures can trigger blooming.
- Fertilize Regularly: Use a balanced fertilizer during the growing season.
- Be Patient: Some orchids take several months to rebloom, so don’t give up!
Frequently Asked Questions (FAQ)
1. How do you get an orchid to bloom again?
To encourage your orchid to rebloom, follow these steps:
Prune the Flower Spike: For Phalaenopsis orchids, cut the spike just above a node if it’s still green. For other types, remove the entire spike.
Provide Adequate Light: Ensure your orchid receives bright, indirect light.
Adjust Temperature: A slight drop in nighttime temperatures (around 55–65°F) can stimulate blooming.
Fertilize Regularly: Use a balanced fertilizer during the growing season.
Be Patient: Reblooming can take several months, so don’t give up!
2. How long do indoor potted orchids last?
With proper care, indoor potted orchids can live for 15 to 20 years or even longer. Some well-maintained orchids have been known to thrive for decades, producing blooms year after year.
3. How long does it take for orchids to rebloom?
The time it takes for orchids to rebloom varies by species, but most orchids will rebloom within 6 to 9 months after their last flowering cycle. Some varieties, like Phalaenopsis, may take up to a year. Patience and consistent care are key.
4. Are orchids toxic?
No, orchids are non-toxic to both humans and pets. They are safe to keep in homes with cats, dogs, and other animals. However, it’s always a good idea to discourage pets from chewing on plants to avoid digestive discomfort.
Final Thoughts on How to Care for Orchids
Caring for orchids doesn’t have to be intimidating. By understanding their unique needs and providing the right conditions, you can enjoy these stunning plants for years to come. Whether you’re a seasoned gardener or a beginner, orchids offer a rewarding challenge and a touch of natural beauty to your home.
Remember, the key to successful orchid care is consistency. Pay attention to your plant’s signals, adjust your care routine as needed, and don’t be afraid to experiment. With time and practice, you’ll become an expert in how to care for orchids and enjoy their breathtaking blooms season after season.
By following this guide, you’ll not only keep your orchids healthy but also create an environment where they can thrive and flourish. Happy growing!
You Might Like

